Monday, March 31, 2014

Happy Birthday to us... With a Zentangled stamp..

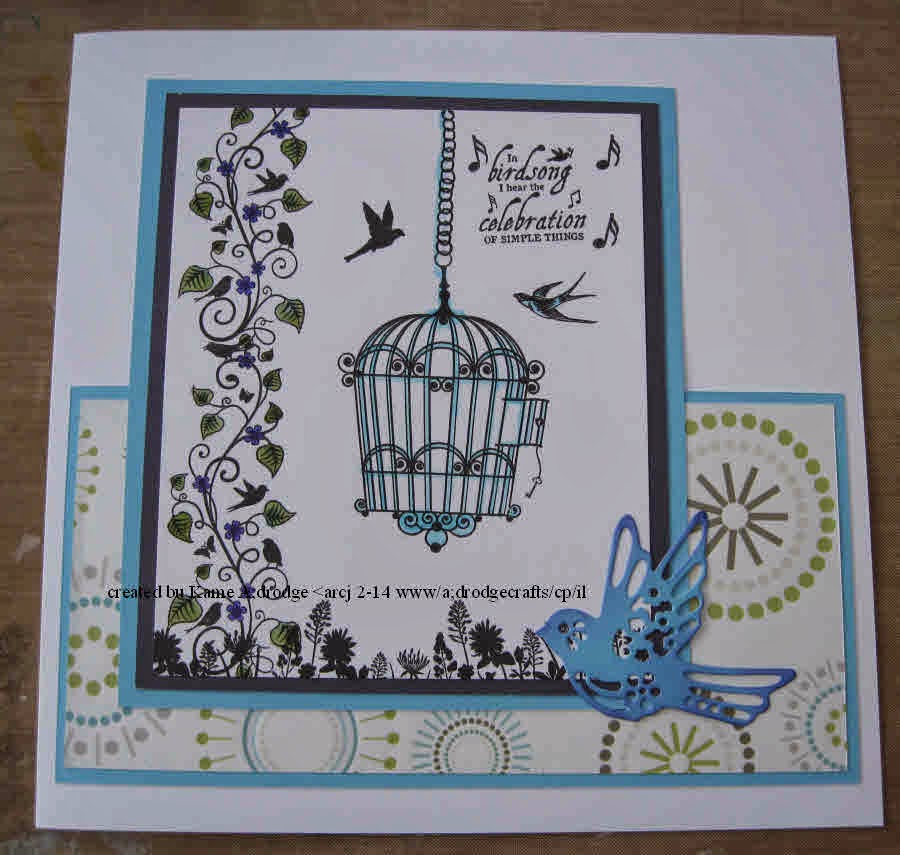
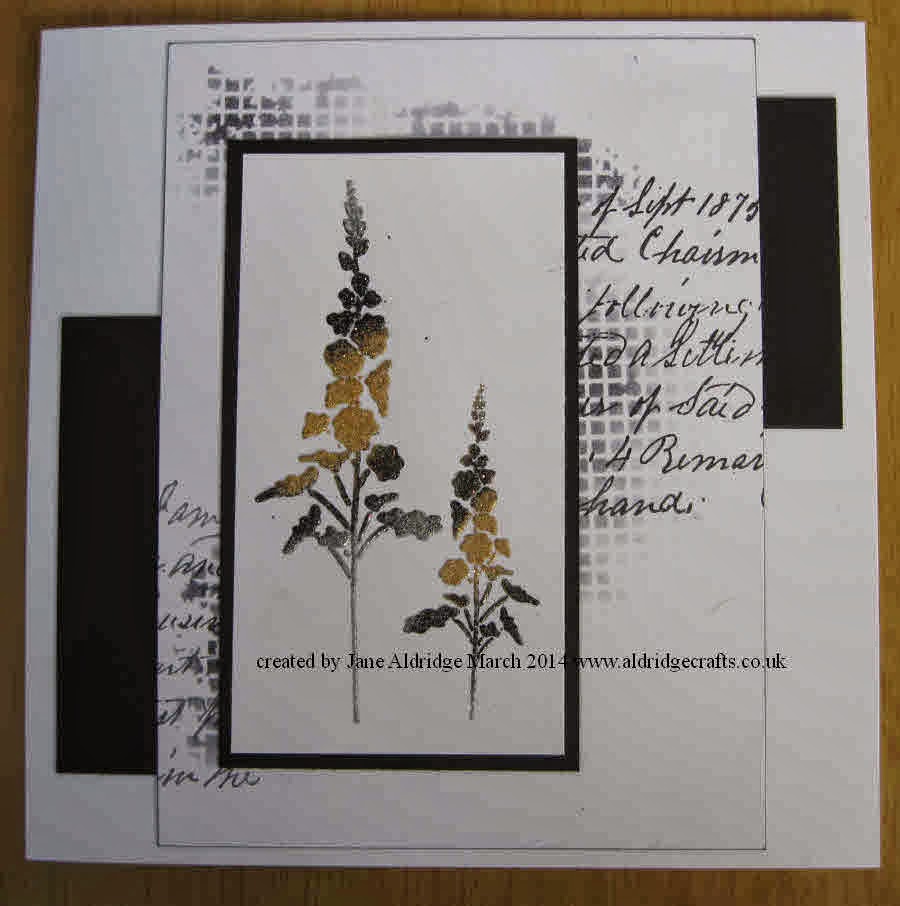
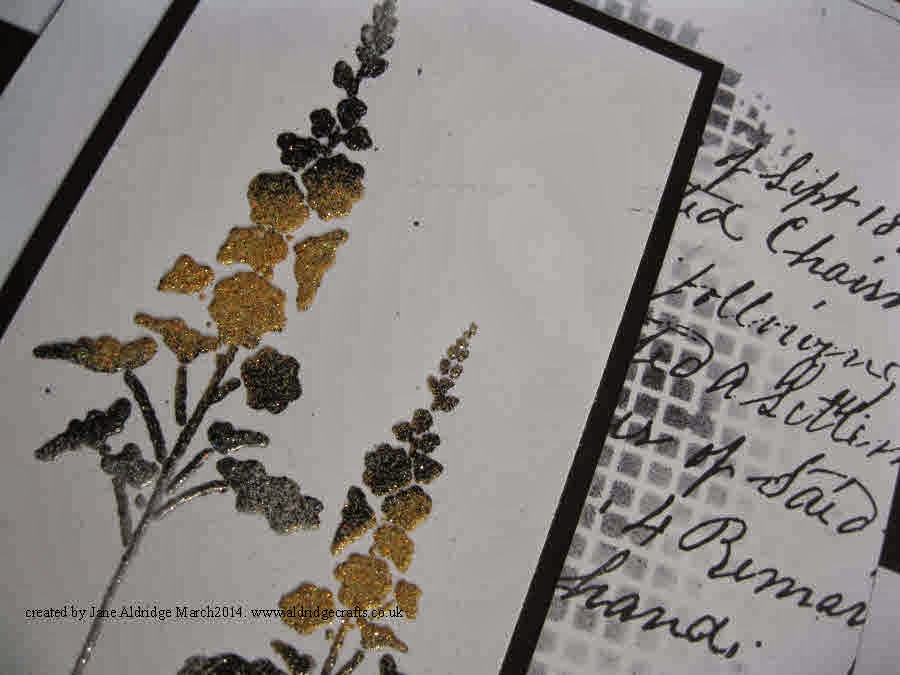
A big hello to my new visitors who met me at Thetford Sincerely Yours show on Sunday.  this is the last of my show pieces from my demonstration.

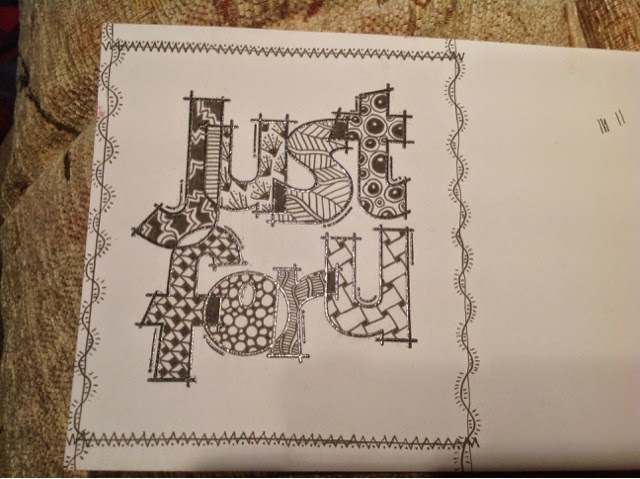
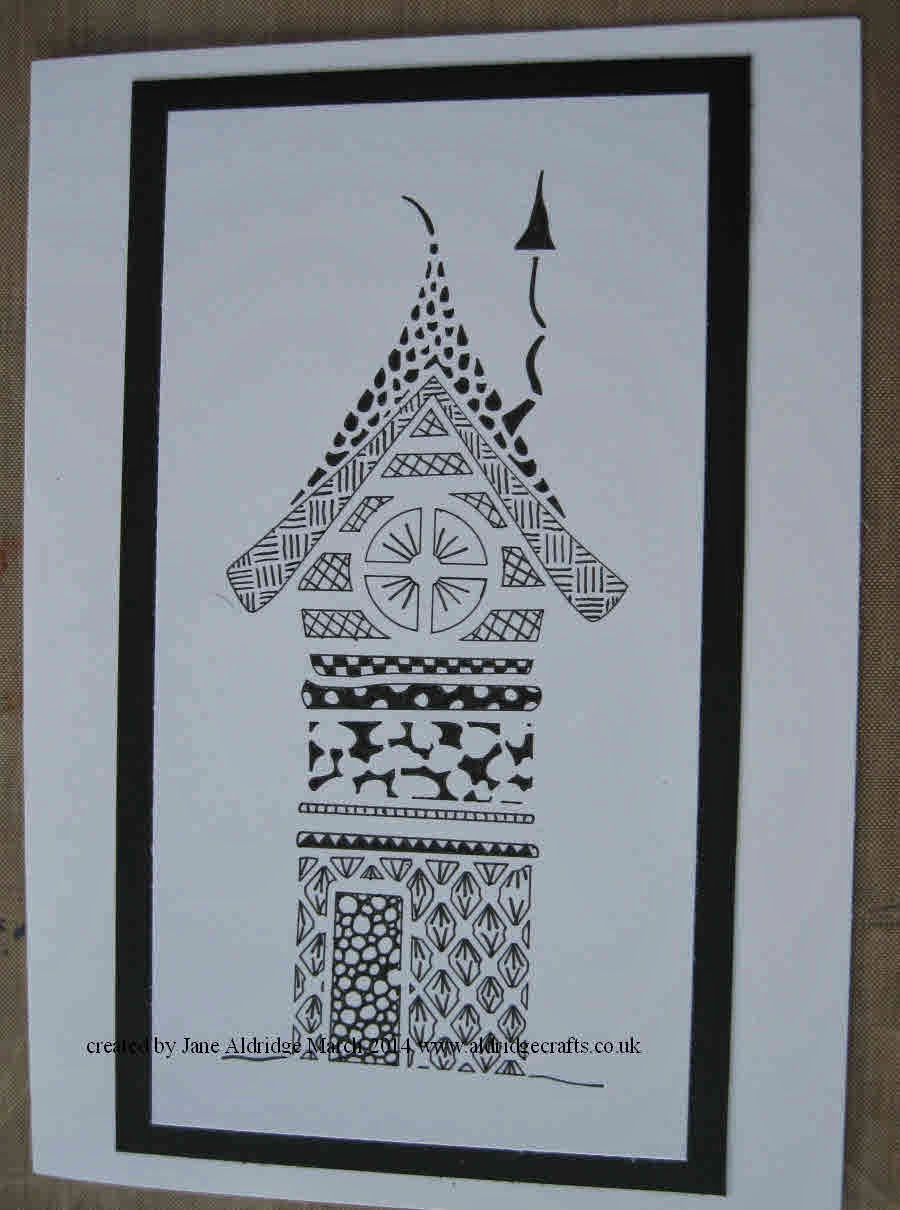
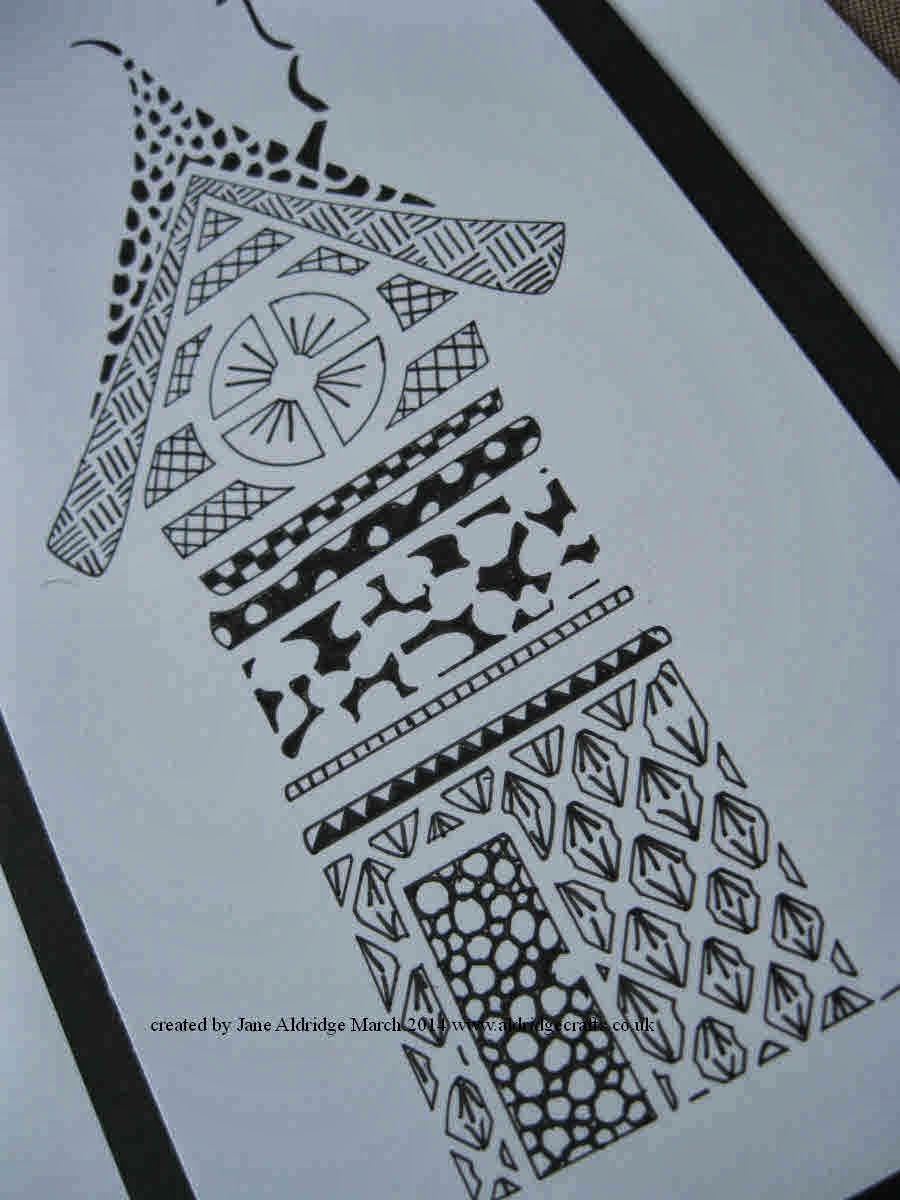
This has been created with the Woodware Just for U stamp and some zentangled patterns created with the help of the fab zentangling books we stock (11 different ones available at only £5 each!).  Once stamped i have used quite neat structured patterns in the letters this time and the borders are all hand drawn too!

I didn't get round to making this into a finished piece yet.  Sarah and I have spent the day today reorganising all the craft products in the shop.  The new layout we think is much clearer and brighter with different departments for our product lines... We hope you all like it!  It was the ideal opportunity to rearrange as we unpacked what came back from the show.

It was so nice to have such a busy show and it was lovely to meet crafters lots of our regular customers and lots of new customers too!

I hope you will continue to follow the blog, there's something new posted every day and if you look back over the last few days posts you will find all the show samples, so if you treeated yourself to the stamps you can get some inspiration.

Did you know its our birthday today?  Two years ago today the doors of our store opened.  We'll be celebrating our 2nd birthday event in store on 12th April.. Prize draw, special offers, demonstrations and more!  Hope you can pop in and see us!

Happy crafting

Jane

Www.aldridgecrafts.co.uk 

Sunday, March 30, 2014

Thetford Samples


Just as this post goes out the doors will open at Sincerely Yours at Thetford and I'll be busy demonstrating these fab designs all day.  I hope you will be able to visit and see these in person as the photos don't do the vibrant colours justice.  At the top we have used Distress Inks, in the middle fab bright ProMarkers and at the bottom Alcohol Inks combined with the floral borders from Chocolate Baroque.  Loving these stamps from Woodware! 

happy crafting

Jane

www.aldridgecrafts.co.uk

Saturday, March 29, 2014

21 with papers


This sample is showing the use of backing papers together with the Woodware 21 stamp.  Another sample for Sunday

When this post goes out I'll be busy setting up my stall!.... almost here!

happy crafting

Jane
www.aldridgecrafts.co.uk

Friday, March 28, 2014

Just for you in Pink and Orange


More samples for this weekend - this time with the Just for U stamp from Woodware.  More playing with layering backgrounds and inks....

More tomorrow!

Jane
www.aldridgecrafts.co.uk

Thursday, March 27, 2014

A little zentangling..


More samples for this weekend.  As well as working with the Woodware stamps - I'll also be doing a little zentangling.  We have had a delivery of books 1-10 in the Zentangle workbooks, so if you fancy a go there will be lots of ideas! 

More samples tomorrow..

happy crafting

jane

www.aldridgecrafts.co.uk

Wednesday, March 26, 2014

Blue 21


This is the first of the samples I've produced for Thetford.  I'll be demonstrating with these fab Woodware clear stamps showing you how to use their bold outline designs together with background stamps, papers and colour. 

These stamps are so versatile - so many things you can do with them.  I'll be showing you more of my samples over the next few days -  hope you like them!

happy crafting

Jane
www.aldridgecrafts.co.uk

Tuesday, March 25, 2014

Blue Oriental Lady

A card from the archives today.  I'm busy getting organised for Sincerely Yours at Thetford at the moment and today I just run out of energy!... so my planned creative day has been postponed til tomorrow and I found a more restful job to do - bagging up new buttons! 

So...  I had a look through some creations from the past and found this lovely oriental card.  I love oriental style and have started rummaging through my collection to start making some new cards - so you may well see this lady again soon as she's one of my favourite stamps - just so detailed.

I've used a textured card blank and spritzed with a Patina Glimmer Mist (isn't it sad that I made this card in 2009 and I know what colour I used on it!).  Spraying onto a textured cardstock gives an extra dimension because the mica collects in the dips in the cardstock.

She has been stamped all in blue and everything else is toned in.  I like to work in one colour - you can get some lovely effects.  The little knot is a Mizuhiki cord knot - great fun to make from Japanese paper cords (we stock these in the shop) - and they are lovely to embellish your cards and even use on your jewellery too!

Well the last delivery has arrived today for the show - lots of Zentangling books!  So it looks like I'm sort of organised!

Back tomorrow with a sneaky peak of what I'm demonstrating at the weekend

happy crafting

Jane

www.aldridgecrafts.co.uk
Shop for Mizuhiki Cords

Monday, March 24, 2014

Bright and Flowery


In contrast with yesterday's muted brown tones, today's is all punch and pizzazz!  I stamped the floral border (Chocolate Baroque Floral Edges Set) - using Black archival around the three edges.  I then used a mixture of watercolour pens such as Marvy Le Plume, Whispers etc to colour directly to paper with.  I picked out the brightest colours I could find in vibrant pinks yellows and oranges. 

to add some contrast I used a mint green shade in the centre so the other colours would pop out.

A final greeting which is from the Woodware '21' stamp and a little ribbon after it had been mounted onto a black border was my finishing touch.

Nice and bright!

happy crafting

jane

www.aldridgecrafts.co.uk
Shop for Chocolate Baroque Stamps

Sunday, March 23, 2014

Little Brown Bird


This lovely little chap is another stamp from the stamps that come free with issue 16 of Creative Stamping.  I started by painting the tag with an antique white and a pale brown shade of acrylic paint using vertical brush strokes so that they were visible and part of the background texture.

Next I stamped using the script from Tim Holtz Royal Script stamp using Versafine Smokey Grey ink, I also stamped the crowns in a couple of places too.

Next I stamped the Chocolate Baroque harlequin border stamp (from Decorative Edges set) using Walnut Stain Distress Ink.  I then left aside to dry.

I stamped my bird and watercoloured using Walnut Stain, Mustard Seed, Picked Raspberry and Aged Mahogany distress inks and cut him out as close as I could .

I stamped all the greetings from the magazine stamps using black stazon and added the easter egg border and the music border top and bottom from the same set.  I then fixed my bird over the top.

I like all the muted brown shades on this one!

happy crafting

Jane

www.aldridgecrafts.co.uk
shop for the Creative Stamping magazine
Shop for Stamps
Shop for Inks and Paints

Saturday, March 22, 2014

Bright Owl


I love to create really vibrant bright backgrounds and then see what I can make with them.  This card started with Alcohol Inks - dropped in big drops and then spritzed with Stazon cleaner to add speckles and muted areas.  The background has also been stamped with a flourish design using plum Archival to give a bit of pattern

I then chose this gorgeous owl from Chocolate Baroque and stamped him in Archival Black ink.  A few elements were then traced with white gel pen so he really stood out from the background.

The wording is also from Chocolate Baroque, and again, I've outlined with pen.  It was such a busy background without it even the bold black stamp wasn't enough to make it stand out. 

Lovely and bright!

I had a lovely day today chatting to crafters and customers at a Craft Fair - always such a sociable occasion!

I'm going to have to be organised tomorrow - I need to create my sample board for my demonstrations at Sincerely Yours Thetford on 30th March... and make two blog projects too... a creative day lined up for me I think!

I hope you get to fit in some crafting this weekend.

happy crafting

Jane

www.aldridgecrafts.co.uk


Friday, March 21, 2014

An experiment in Zentangling

Picture One
Picture Two
Picture Three
OK... time to start experimenting a bit with my zentangling.  I've posted a couple of designs recently using stencils to zentangle.  I fancied trying out working onto a patterned background and as I've recently acquired a new dictionary to alter from the charity shop - I thought that would be a good project to try. 

I picked the sweet poppy stencil - Butterfly Tree and I wanted to zentangle the background, not the tree.  I started by drawing around the outline of all parts of the design (see picture one).  I then started to draw random segments and pattern within it.  i tried to keep a variety of patterns and different darks and lights.  When I got to the edge of the page I drew in some twiddly scrolls to keep the edges soft and fluid.

It's not all that clear to see from the photo - but looks better when it's in front of you.

Lessons learnt from this one...  darker patterns are needed to give a bolder definition to the design.. perhaps to leave some blocks un-patterned or filled in completely..   I will be continuing to experiment with this technique!

happy crafting

Jane

www.aldridgecrafts.co.uk
Shop for Stencils

Thursday, March 20, 2014

Can you see the wood for the trees...?


A bit of an experimental project this one!  I had misted the background a long time ago - using a leaf mask and some bright colours in yellows, oranges and lime green tones with  a splash of blue.  I added my Sweet Poppy Walk in the Park stencil and used a gold embossing paste (from Dreamweaver) sprinkled with a little black and gold glitter (those who came to my demo morning saw me doing this bit!)  Once it had dried, I felt it needed a little bit of definition.  I added some distress ink using cut n dry - Dusky Concord - a purple shade.  The paste was a little tough on my sponge but a small price to pay!  I added the definiton to the trees to make them pop and then added a simple border to the left and bottom side using a fineliner and a ruler to draw three parallel lines. 

the bird is cut from black card using a Crafty Individuals die and the wording is hand-written onto white card.

It was all mounted onto an 8x8" card blank.

I was most pleased with the results on this one... a technique I will play with a bit more - coloured paste onto coloured backgrounds.

happy crafting

Jane

www.aldridgecrafts.co.uk
Shop for Sweet Poppy Stencils
Shop for Cosmic Shimmer misters
Shop for Crafty Individuals Dies

Wednesday, March 19, 2014

Birdcages in blue


This is another card made using the fab stamps that come free with Creative Stamping (Our copies of the magazine have now arrived in the shop and are ready to send out!).  I started by stamping the flowery border in black archival.  I then stamped the birdcage, birds, reeting and the flowers at the bottom - again all in black archival.  Now to add a little colour - I used my Cosmic Shimmer Drawing Inks again - some really bright tones in purple on the flowers , leafy green on the foliage and then the very pale blue to make the birdcage stand out.

I found a lovely backing paper to match the tones, so decided to mount it just in a simple black and pale blue borders. 

I cut my little bird from my Crafty Individuals die from bluecard (the same as I've used on the mount) and then coloured it using Purple Archival and cut n dry foam - to make sure it stood out from the background. 

It's all mounted onto an 8x8" card blank.

Loving these stamps...  ! :-)

happy crafting

Jane

www.aldridgecrafts.co.uk
Shop for the magazine with the free stamps
Shop for Drawing Inks
Shop for Crafty Individuals Dies

Tuesday, March 18, 2014

Bright Zen Fairy House


Another play with my Sweet Poppy Zen Fairy House stencil.  This time I have applied my Distress Inks with Cut n Dry foam through the stencil. 

Next I have applied my translucent paste through the stencil - but this time no glitter!... that's the only difference from the technique from last time - but doesn't it make a difference!  It looks lovely a glossy finish.

We've just got the mini distress ink packs in stock.  You get four different mini pads in one set, so if you haven't got any distress inks and fancy this technique - they would be just perfect to get you started!

A quick post this time for a quick project!

happy crafting

Jane

www.aldridgecrafts.co.uk
Shop for Sweet Poppy Stencils
Shop for Distress Inks


Shop for Distress Inks

Monday, March 17, 2014

Red Peonies and Birdcage


I've been sent the stamps that will be free with the next issue of Creative Stamping that's due for release very shortly.  I've started to create some samples with them - and just love the designs!  As ever the quality of the stamps is excellent  - easy and clear to stamp.  I have played with the peony flower on this card, together with the birdcage and a couple of birds.  I drew in the links to suspend the birdcage using a fine liner (just draw lots of circles in a line!).  All stamped with Archival black.  My colour is added with Cosmic Shimmer Drawing Inks - nice and bright for the flowers.. ever so subtle for the birdcage. 

I happened to have a really bold pattern 12x21 sheet of paper in my stash that went with the colours perfectly - so it was all put together onto an 8x8" card.

What do you think....?

You can pre-order this issue of Creative Stamping on the website - I suspect it will sell out quickly!

happy crafting

Jane

www.aldridgecrafts.co.uk
Shop for Drawing Inks
Shop for the magazine

Sunday, March 16, 2014

Zentangled Zen Fairy House


As soon as I started to play with this Fairy Zen House Stencil from Sweet Poppy Stencils, I was itching to use it to zentangle with.  It's a perfect design for it as it has different sections for different patterns.

I started by tracing the outline of all the sections with a fine tipped fineliner.  Next I gradually worked my way around the design doodling different patterns so there was an even mix of dark patterns and lighter areas.  Just a simple black mount was all that was needed and it was mounted onto a 5x7" card.

Simple... but oh so effective!

Right.. better dash - off to meet my parents for a meal out!  enjoy your Sunday!

happy crafting

Jane

www.aldridgecrafts.co.uk

Saturday, March 15, 2014

Just peachy!

I made this card in the Die cutting workshop a couple of weeks back.  It's not often I work in peach colours - not one of my favourite shades, but I picked out this colour because it was something I wouldn't usually pick (if that makes sense!).  It's all to easy to always work in your favourite colours and its nice to do something different.

This is made on an 8x8" card blank and you can create it from just one sheet of 12x12" coloured cardstock.  Firstly, cut your base panel so you have a white border on your card blank.  Then cut your white squares - I happen to have a square die the perfect size, but you can cut them by hand if you haven't.  You will need 9 squares.  Then emboss each square with an embossing folder, 9 different ones or you could use two different designs and have the corners and the middle in one and the other four in the second design... or three designs cut in rows....lots of options!

Next I stuck down all the squares.  This is probably the most difficult part of this design as you want to try and keep your borders even and your squares straight.  I find it easier to stick in my four corners first and then make sure the gaps are even on the central ones.

You can then start to cut your die cut shapes to go on top.  A handy tip is to cut them out of white first, you can then cut more than you need and play around until you have the arrangement you want.  Then you can cut them out of your 12x12" sheet, taking care to work out that you can fit them all onto what's left over.

I then stuck them on using cosmic shimmer dries clear glue and as a final touch added clear glitter onto the heart using a quickie glue pen.  The heart die is a Memory Box Die - Bingham Heart.  The corner is the Memory Box Madiera Corner.

happy crafting

Jane
www.aldridgecrafts.co.uk
Shop for Memory Box Dies
Shop for Quickie Glue Pen
Shop for Embossing Folders


Friday, March 14, 2014

Lady in Red.. or is it burgundy.. well pinkish burgundy.....


This is such a lovely topper sheet from Kanban.  I've had it in my stash for ages... but you know when you get a design that you really like that you don't want to use it, because then it's gone and you can't admire it any more!  Well today was the day to be brave and use my elegant lady topper. 

I mounted it onto a fuschia pink mirri card - which mirrors the foiling on the dress perfectly.  I then added a Kanban background card behind - of course it has been cleverly cut so that it doesn't go the whole way behind (what and waste 2" of lovely cardstock.. oh no!)  The flowers and butterflies are all from the same sheet, as is the greeting.  It's mounted onto an 8x8" card - and really looks an elegant card.

happy crafting

Jane
www.aldridgecrafts.co.uk

Thursday, March 13, 2014

Quick and easy cards


I've been working on a deadline or two this week..  Lots to fit in with all the behind the scenes website work and boring business paperwork, which meant I didn't have as much time to craft, and yet needed to create some lovely Mother's day cards for the shop.  So, it was time to go for some quick, easy and yet pretty cards.  I found a pretty pack of papers - I think they were a magazine freebie - perfect for the job.  I took 6x6" card blanks and stuck the papers down to the card.  I then went in with my Quickie Glue pen and clear glitter and highlighted details on each of the designs.  They don't show particularly well in the photo (hence the closeup of one!).. but they really twinkle in real life and the glitter gives the papers a real lift!.  I didn't have any suitable peel-offs or stamps, so I printed a range of greetings in different sizes and fonts onto cardstock with my computer and used these to mount on my card.

See.. simple, quick, easy and very pretty

Go on... have a rummage through your stash of papers.... you know you want to! :-)

happy crafting

Jane
 www.aldridgecrafts.co.uk

Wednesday, March 12, 2014

Elegant Wildflowers


I'm still creating with the pieces that I made in last Saturday's demonstration.  This is the wildflower Sweet Poppy Stencil.  I started by applying translucent paste through the stencil and then sprinkled over with sparkly embossing powders in strips - black, silver and gold.  I then heated from underneath - be patient - it takes a bit of time before it starts to bubble and melt the embossing powder.  Once it has heated through give it a final blast from the heat gun on the top to make sure that all the powder is melted.  This gives the finished piece really nice texture. 

I've mounted this simply onto the black background.  I wanted to keep the background quite elegant.  I used my Tim Holtz Royal Script stamp in black archival and then applied the same ink with cut n dry foam through a new Memory Box Stencil to add the cross-hatch detail.  I tried to not make it symmetrical - including the black card in the background being placed at different heights and cut in different widths.

It's been mounted onto an 8x8" card blank.

I really like the simple elegance of the layout and the colours on this one.  I think you could use these flowers to make a really elegant sympathy card too by sticking with simple colours and message.

happy crafting
Jane

www.aldridgecrafts.co.uk
Shop for Stencils (including Sweet Poppy)