Friday, March 7, 2014

Butterflies and flowers

I've been busy trying to create some Mother's Day cards this week.  I found this paper amongst my stash goodness knows where I got this sheet from!).. and I liked the colours so I used that as my inspiration for this card.  I started by finding a matching green and cut and mounted these onto my 8x8" card.  I then cut out a mixture of different butterfly and flower dies from white card and played around until I found a composition I liked.  Once decided, I then cut out the branch (a Cottage Cutz Die) from Brown and pink card and the butterflies (large one is Marianne Designs, small is memory box) from a piece of card I had painted with pint and red distress inks.

The pink card I cut the blossoms from was one I had left on my craft table in the sun, so the colour was a little faded in places - so no good for matting and layering, but perfect for different toned flowers and as it was a bazzil bling sheet, the front and back were different too, so I managed to get a subtle mix of shades and textures just from one sheet!

My finishing detail was to add a little pink stickles to the centre of my flowers and a little light dusting of crystal stickles to my butterflies.

Don't forget we have the Sweet Poppy Stencils demo tomorrow in the shop at 10am.. hope you can make it!

happy crafting
Jane
www.aldridgecrafts.co.uk
Shop for Dies

Thursday, March 6, 2014

Little Acorn.... alright.. actually.. it's quite big!


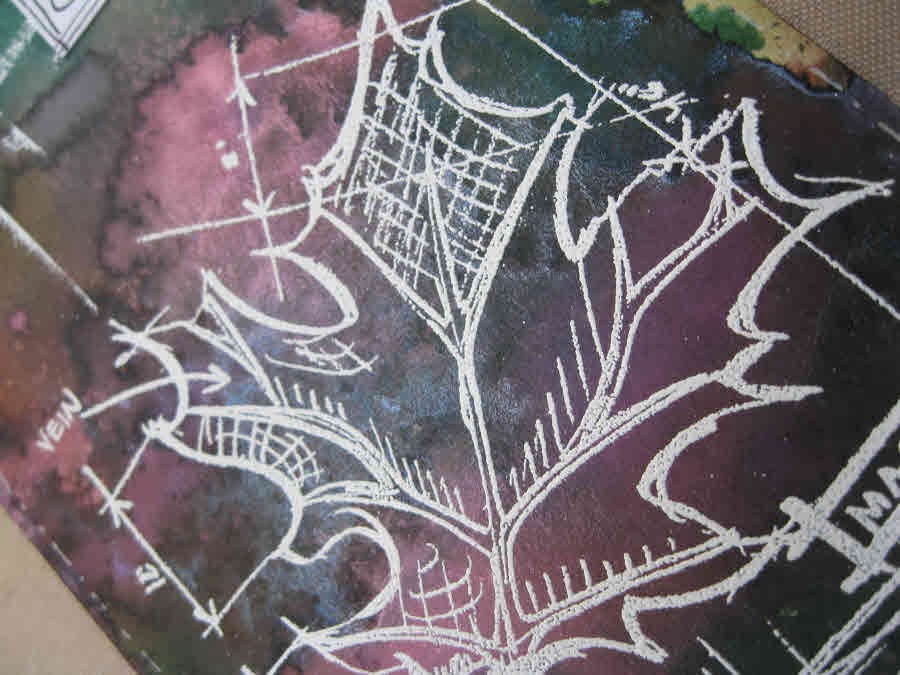
Bit of an experimental one today!...  Playing around with my Tim Holtz Autumn Blueprint stamps again.  I started by embossing the acorn in white embossing powder.  I then applied Distress paints over the top - trying to get a sort of grungy stripe thing happening.  You need to make sure you wipe away the paint from the embossing powder to keep it's whiteness - but by doing this it helps the paints blend.

This time, rather than a greeting at the top, I added some Washi tape... not sure if it's a bit too bright in hindsight.. but got to experiment.. right?   I stamped with a swirl from one of my Chocolate baroque sets in Archival Purple ink, and then added the dotty border at the top by applying ink through a border stencil.  I then added lines of 4mm double sided tape (Stix2 of course!) and applied sparkly crafty fluff in Purple to create a border with a difference.

So what do you think.. did the washi tape work or not?.....

happy crafting
Jane

www.aldridgecrafts.co.uk

PS - Don't forget we have a Sweet Poppy Stencil demo in store on Saturday at 10am.  Free to attend - just come along!

Wednesday, March 5, 2014

Butterflies and cogs


Today's project has been created over many different stages!   I'll try my best to remember them all!  It started life as a white sheet of card which I stamped the butterfly stamp from Crafty Individuals using Flitterglu and then added flakes.   It then remained in my craft box for ages (when I flitterglu I tend to do a few to make the most of the glue!).  When I rediscovered my butterflies I thought I would play around with contrasting with a dark ink - so out come the favourite Distress Inks and I started to apply colours...  browns, a bit of yellow, a touch of mahogany - all warm tones to compliment the gold.  I then stamped the script and postmark background using a Creative Expressions stamp and Distress Ink.  I then got artists block... just couldn't decide what to do to finish the piece off... so once again it sat in my craft box for a couple of weeks.

I was given a lovely Tim Holtz stamp which I wanted to play with and when rummaging in my backgrounds box, I found this and thought it would be perfect.  A little detail was needed on the right hand side, so I picked out my cogs border mask and run it through as an embossed detail with my Cuttlebug.  A little Gilding wax to highlight the detail gave me a good base. 

I stamped my words onto a separate card and drew boxes round each word.  I added a little distress ink - mainly yellow tones so it took away the starkness of the white card and then cut out each word and mounted it onto my card.

It took a while.. but got there in the end!  So if you get stumped with a project - don't bin it... put it in your stash and come back to it.. sometimes you rediscover it when you have a new stamp or topper in your collection - or sometimes another day just brings a fresh idea!

happy crafting

Jane

PS... and finally... we may not have won..this time!.....  but I'm displaying our runners up badge with pride!
www.aldridgecrafts.co.uk

Tuesday, March 4, 2014

Leftovers!


It's amazing what you can do with leftovers!  I've got into the habit now of flushing through my Ink Misters once I've used them to minimise the nozzles blocking.  Well after creating my steampunk panel the other day, I was using the blue and bronze misters so in order not to waste the ink, I unscrewed the nozzle (so it doesn't suck up any more ink) and sprayed it onto a blank piece of card to empty it and did the same with both colours - then took the nozzles and flushed them through with water.  Seemed a shame to waste all that ink - and by randomly covering my card - created this most amazing almost Patina like combination of colours - completely different from how they looked on my panel as there I had been very sparing with the dark bronze, this time I wasn't!

So what to do with my interesting coloured card.. aaaah I know, I can use my new Clarity stencil!  Clarity created the most amazing stencil and trade pack - I was reading on Barbara Grey's blog all about it - how it was all put together by themselves - and what a lovely idea to include a stencil for us all!  I've not got their stencils in stock yet (run out of budget at the trade show!!)... but they are on my list to get in stock soon - their range is fab!... anyways I digress....  I grabbed my stencil and run it through my Cuttlebug so it embossed the detail.  I left the stencil in place and carefully traced around all the outlines with my white gel pen - to give the design that extra bit of punch!  Just a few dashed lines at the bottom was all I felt it needed.

A really simple to construct design - but looks really effective - and it's now up on the gallery wall in the shop - do come and have a look at the colours and how they've mixed - its fab!

happy crafting

Jane

PS - don't forget - Sweet Poppy Stencil demo by me on Saturday at 10am in the shop!

www.aldridgecrafts.co.uk

Monday, March 3, 2014

Creative Birch Leaf


Today's card features my Tim Holtz leaf stamps.  I started by creating a background using Distress Paints - this card was picking up the paint from my craft mat after getting the most of the paint off on a previous print.  This gave me a nice random effect in the background - nicely patchy!

Once completely dry, I stamped and embossed my leaf stamp.  I then used my Distress Paints in autumnal shades to paint in the detail, taking care to wipe the paint away from the embossed outline so that it remained nice and crisp.  I stamped my words (Chocolate Baroque) in Archival Black and as a final detail I used a dot mask to add my dotted border around the outside with a little walnut stain distress ink.

I was very pleased with this card.. the colours look even better in the flesh - nice and vibrant!

I will be doing a Sweet Poppy Stencils demo in the shop this coming Saturday - starting at 10am - hope some of you can make it!

happy crafting!
Jane

www.aldridgecrafts.co.uk

Sunday, March 2, 2014

Blue lady for a happy day!

It's a good day today.  This post is scheduled as I'm off to visit my in-laws for a family lunch.  It's my father in-laws 80th birthday tomorrow... and it's my birthday today - hurrah!...  so it's going to be so nice to catch up over a meal. 

I chose this project to share with you today... because that's just the sort of dress I would love to wear!  Such an elegant shape and she looks lovely in her flowery fabric too!  She is called Pure Elegance and is a stamp from Creative Expressions.

I've see a lot of projects lately working on textured card and it's something I keep meaning to do... but forget!   Then I see another project pop up on Pinterest or on someone's blog and I say.. oh yes.. meant to get out my textured card!  This is a perfect project to work on too.. as I have a big kit of matching papers, card blanks, embellishments and ribbons that I ordered of the shopping channel many moons ago.. and whilst I've dipped into everything, the card blanks aren't really my cup of tea as they are bold prints and not always easy to make into a card, however they are lovely textured cardstock so perfect to cut apart and work onto!

This was a pastel blue card blank, so I worked around the outside with Salty Ocean Distress Ink with blending foam and then added a little walnut stain to give a dark edge.  I then applied the walnut stain ink using foam through my dotty border stencil (which is from crafter's workshop).  I stamped and embossed my lady and painted in some of her details with the salty ocean ink.  I then stamped and embossed her onto my blue floral paper (which is from a papermania pad).  I cut out the dress and hat and then stuck them over the top of my stamped design - voila... pretty floral dress!

I kept it simple and just mounted onto a black mount and then onto a 5x7 card blank.

And as it's my birthday... you are all encouraged to have cake on my behalf!

happy crafting

Jane

www.aldridgecrafts.co.uk
Shop for Elegant Lady stamp


Saturday, March 1, 2014

Autumnal Leaves (Yes I know it's almost spring....!)


I've been playing with my new Tim Holtz stamps.  I picked these out as one of my Christmas presents, but haven't had a proper experiment with them yet.  I had this background in my stash that I had created using my ink misters - lots of dark shades - plums, black, bronze.  There was a few white areas at the edge of the card that were a bit too white, so I went over it with Peeled Paint Distress Ink. 

I stamped and embossed my leaf with white embossing powder and then added a dot and dash border with a white gel pen.  I hand-wrote the creativity wording and mounted at the top as a final detail.  The thread is shamballa thread that we've just had arrive in some fab new colours!

More from these stamp sets to come!

happy crafting!

Jane

www.aldridgecrafts.co.uk


I used the edge of my ruler to stamp the lines at the top and emboss with white powder.