Showing posts with label Cosmic Shimmer Misters. Show all posts

Saturday, May 17, 2014

Indigoblu... more words! #145


I could only put in one entry for the Indigoblu words blog challenge - but I made a couple to choose between.  This was the other piece I created.  I started with a colourful cosmic shimmer ink spritzed background.

I started by stamping the Indigoblu Tree-mendous stamp around the borders in my latest acquisition - Archival Potting Soil.  I then stamped my greeting from the BFF set in black.  I drew a border around the greeting and added some dashes in black and white pen.  I finally traced all the outlines of the leaves with a gold gel pen to add a little extra detail.

It was such a difficult choice in the end as to which one to enter into the blog challenge - I couldn't decide so my hubby got the final vote and preferred the colours of yesterday's piece.

So which is your favourite out of the two?   Today's project or yesterday's one?

happy crafting

Jane

www.aldridgecrafts.co.uk

Friday, May 16, 2014

Indigoblu Words Challenge #144


I spotted that Indigoblu Challenge blog had a challenge theme of words this month - and thought I would have a go at creating something to enter the challenge. 

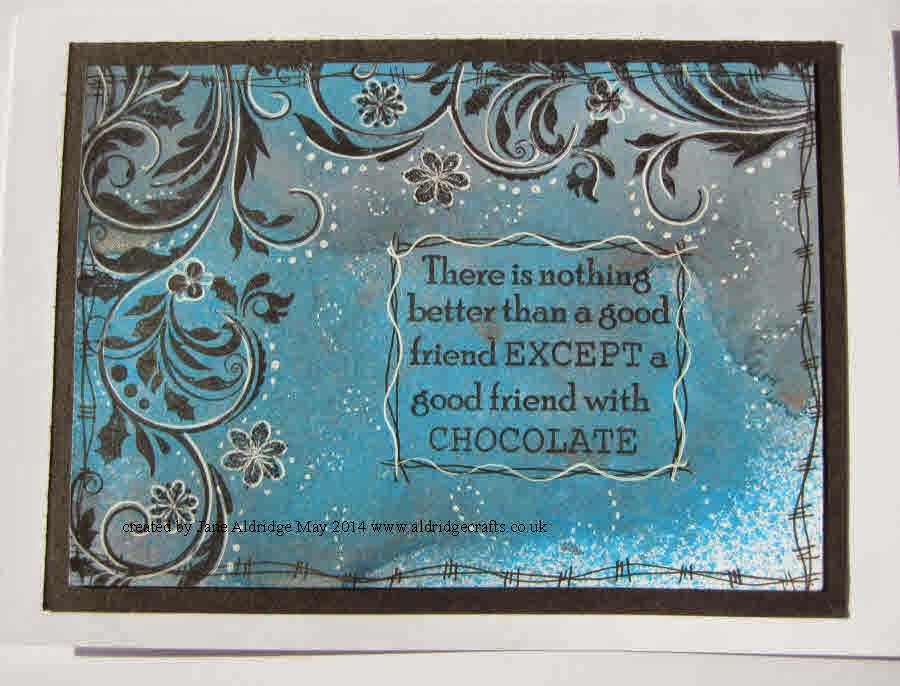
I started by spritzing my background with a mix of blue shade Cosmic Shimmer Mica Sprays.  Once dry I stamped my words (Indigoblu BFF set). 

I then started to add my border detail - I've used a Christmas stamp - (Indigoblu Baubles Flourish).   I love this stamp because it's perfect for Christmas - but the rest of the year, just stamp the flourish part and turn the snowflakes into flowers!

I then added plenty of white and black pen highlights - including some little white dot swirls in the background.  It's been mounted onto a simple black mount onto a 5x7" card.

I am entering this for the Indigoblu Challenge Blog Words are all you need Challenge

happy crafting

Jane

www.aldridgecrafts.co.uk

PS - don't forget it's craft club in Attleborough tonight - join us for a free Scrapbooking for beginners make & take!


Saturday, May 10, 2014

Owls #138


I found this tag amongst my background stash box.  It has been cut with a Sizzix scallop die and then spritzed with  mix of brown green and gold Cosmic Shimmer Ink Misters.

All I had to do was decorate it!  I've had this Magenta owl stamp for a while and been itching to use it - and this was the perfect project.  The background was just so pretty I didn't want to go too elaborate with the decoration.

He was stamped and embossed with detail black powder and then coloured using a Distress Marker with a few white highlights.

The dash border was added with a black pen and then the final detail was to tie some baker's twine around the top and tie on a little owl charm.

Did you know that we stock 100s of design of charms in our shop - they are perfect to accent your crafting projects!

Entering the following challenge: Crafts Galore Challenge: Anything Goes

happy crafting

Jane

www.aldridgecrafts.co.uk
Friday, May 2, 2014

Tick Tock #130

 Today's creation is the other side of the double page in my journal - so same colour background as yesterday's created with Cosmic Shimmer Ink Misters.  I started by stamping with my large script samp in blue Versafine ink. 


Next I glued on a strip of the Tim Holtz Melange Tissue paper and allowed to dry.  I drew in some zigzag details on the left and top right corner with a fineliner and added some texture detail through a mask with some blue ink.

I cut out my clock die (Marianne Designs) and tinted it with some aqua cosmic shimmer pearlescent paint and stuck it onto my page
 I hand-drew the clock hands for a change (there are some that I could have die cut in the same set - but fancied something different today!).  I handwrote Tick Tock at the top and then coloured the letters with my aqua pearlescent paint and added white highlights.  I then wrote 'tick tock goes the clock' around the outside of my clock die.  I next stamped a pair of wings from a Tim Holtz Set using blue ink at the bottom of my page (it was a little bare and needed something!)
 Next for my bird... OK ... he's quite an artistic expression of a bird - but was up for trying a little handrawing today!  He was drawn onto a dictionary page and tinted with the aqua paint and his legs drawn directly onto the page.

 Finally the words - all handwritten and tinted with aqua paint.  I quite enjoyed the freedom of this paint... not many stamps - more freestyling!

If you fancy trying out collage inking and stamping - come and join my workshop in Attleborough next Thursday 6-8pm £15.  You too can come and have fun getting inky and creative!

happy crafting

Jane

www.aldridgecrafts.co.uk


Thursday, May 1, 2014

Life is Beautiful #129


I haven't used my journal for a while, so I rescued in from the draw and looked through to see what backgrounds I had ready.  I had a double page spread all inked and ready to be decorated - so here is one side today and you will get the other side tomorrow!

It had been sprayed with blues and purples from Cosmic Shimmer Mister Inks range.    I started by stamping a large text stamp in the background using a blue ink.  I then added a few patterns through a mask with some toffee coloured ink

I was in the mood to play with my Sweet Poppy Stencil Dress design - but wanted to play with something different rather than just put paste through, so I started by tracing parts of it with the fineliner pen.  I then added some colour with Cosmic Shimmer Watercolour Paints.
I added some black and some white highlights with pens.
Next some words.... I wanted something really large and bold and didn't have stamps large enough, so handwriting it was!  I just took my time and then added some depth to the letters with my pens.  Then a lined border around the outside and I was finished.

Nice to just play!.....


Jane
www.aldridgecrafts.co.uk


Sunday, April 27, 2014

Miracles #125


Happy Sunday all - hope you are getting some crafting time today!  My creation for today is using a Cosmic Shimmer Ink Mister background that I had already done in my stash using a selection of pinks and lilac shades.  I resisted the tempation to fill in more colour as it had quite a bit of white space.

Unusually I started with my hand-drawn border (in truth I was buying some thinking time as to what to do with the piece!).  I thought I would use my new Indigoblu stamps - Enjoy Life.    The miracle stamp caught my eye so I started by stamping this in the corner in black.  I then used the corner of my clear block to create a frame around the words.  I then went over the top and right side to create a heavier border and then on the other two sides with white gel pen to give the impression of dimension.

I stamped the little scroll stamp from the same set this time using the purple archival - it makes a lovely pattern when stamped side by side.  I picked out some flowers to layer up and topped with a sequin.

I used the tall birch Memory Box die together with the perched bird also from Memory Box.  I cut the tree twice and used the branches as extra.  I coloured them using brown shades of Promarker and the bird with purple and magenta shades and added an eye and wing with a fineliner pen.

happy crafting

Jane

www.aldridgecrafts.co.uk

Friday, April 11, 2014

Purple Panel #109


Still playing with Misters and inks in today's creation.  I've used really vibrant shades this time.  This was the backround I created showing my workshop ladies how to use the misters and masks... so I'm afraid I didn't note the colours!... but there look like some fully purple in there I think!

Loving the colours on this piece - and I wasn't sure if the stamped designs might get a little lost in the colour - but no, I was really happy with just a couple of stamped designs - the words from Chocolate Baroque Artistic Affirmations and the butterfly is the Zentangled Butterfly from Woodware.

there are some masks in the background too - some swirls and the clock face mask too.

I've also stamped some swirls in the background too!

There was so much happening with this piece I thought just a few white highlights and a white border for a change was all it needed.   

the colours are fab - it's already up on the gallery wall in the shop if  you want to have a look!

So excited to be having our birthday celebrations tomorrow - I can't quite believe we've been open for 2 years now and I absolutely love love love working with my great friend Sarah in our fabulous shop.  happy happy times!

I'll post tomorrow all about our day... I'll try and take lots of pics if I can!

happy crafting

Jane

www.aldridgecrafts.co.uk

Thursday, April 10, 2014

Green Daisy #108


My final sample from Monday's workshop - this was to demonstrate the Cosmic Shimmer ink Misters.  I started by spraying the background with green and orange shades of mister - being very generous with the covering of ink, and while still when then sprayed over some masks to add extra detail.

Once dry, I then applied the compass mask and added ink through the mask (distres Ink Peeled Paint).  I stamped my Daisy (Jumbo Daisy - Stampendous) onto separate card and coloured using distress inks - scattered straw in the middle, peeled paint and I think peacock feathers on the petals.  I also added some yellow stickles in the centre of the daisy too.

I stamped the floral accent from the Chocolate Baroque flourish butterflies set to add extra flourishes behind where my flower would sit. and also stamped the greeting (Kaisercraft).  As extra detail I drew around a mask in a few places using white gel pen and added a dash border with my fineliner and added some gem accents.

The pictures do not do the colour justice - this is a really vibrant green and the mica shimmer is just fabulous!  It'll be up in the shop if you are local so do come and have a look at this - and the panels from the last couple of days.

Not long to go now til our birthday event on Saturday.... getting excited!!

happy crafting

Jane

www.aldridgecrafts.co.uk
Shop for Cosmic Shimmer Ink Misters
Shop for Stampendous Daisy Stamp


Sunday, April 6, 2014

Zentangled Daisy #104


Today's creation features the fabulous Jumbo Daisy stamp from Stampendous.  It's been on my 'to do' list to zentangle this lovely flower - all those large petals lend themselves to the technique perfectly!

So... I knew I wanted to zentangle the flower - what to put it onto... how about a shot of vibrant purple colour!  I just love the contrast.  I've sprayed using a mix of purple and pink shade misters - Cosmic Shimmer - including the chalk pink and purple to add some muted tones too.

The flower mask is from Crafty Individuals and inked using Archival Purple ink and the ruler design is a that special touch mask.  The words is from a Kaisercraft stamp set stamped with archival Black.

I've also put a few feint dots in the background with a mask too as the background was lacking a little something interesting.

some borders and detail with a black fineliner and I'm all done!

I've got a fun day tomorrow - teaching a lovely group of ladies to use the Cosmic Shimmer misters and stamps to make a decorative panel - I'm expecting about 25 and just little me in 2 hours.... it'll be manic... and fun fun fun!!

Hope you have had time to fit in some crafting time today

happy crafting

Jane

www.aldridgecrafts.co.uk

PS - Don't forget there's only a few days left to enter into our Tattered Lace Die Giveaway - every tattered lace die purchased between now and midnight 11th April will gain  you one entry to win a Tattered Lace die of our choosing!

Shop for the Stampendous daisy stamp
Shop for ink misters
Shop for masks.


Friday, April 4, 2014

Citrus Butterflies


This is the last card I made for the citrus themed Chocolate Baroque colour challenge.  The background is Cosmic Shimmer Misters - Mango Blaze, Golden Mint and Pastel Yellow Chalk. 

I've stamped using Distress Ink Squeezed Lemonade and the harlequin background from Chocolate Baroque's Decorative Edges set.  I've then stamped the floral swirl from Chocolate Baroque's Butterfly Flourish Swirls set using Ripe Persimmon. 

I stamped the main butterfly flourish using Archival Black and then stamped again onto another piece of card so I could colour the butterflies with the same misters and added some highlights with Orange Peel Stickles.  I cut out the butterflies once dry and mounted over the top of the design.  I added white gel highlights to the swirls.

The wording is from the Artistic Affirmations set and the border is hand-drawn with a fineliner pen with a white line for contrast.

happy crafting

Jane

www.aldridgecrafts.co.uk

Join us on our 2nd birthday celebrations on 12th April in store we'll have demonstrations, special offer prices and a prize draw!  10-4pm.

shop for Chocolate Baroque Stamps
Shop for inks

Thursday, April 3, 2014

101st post...... A little flowery....


I've only just realised that yesterday was my 100th daily post since starting posting a creation a day just before Christmas.  When I started I wasn't sure if I could keep up with the schedule... but apart from the odd days (fortunately I have a large archive of stuff I've made and I can dip into on an emergency!)... and I've found it a pleasure to keep up with.  Even better, the shop now looks so much brighter with a new supply of samples to inspire too!

Today's creation is another play with my Chocolate Baroque stamps for their colour challenge.  The background is Cosmic Shimmer Misters - Pastel Chalk Yellow, Mango Blaze and Golden Mint.  I've added some dot details using Distress Ink Ripe Persimmon through a mask.

The words are from Chocolate Baroque Artistic Affirmations.  I'm not sure which set the flower is from - but I've stamped out onto the same background and added some shaded with the ripe persimmon.  I added some white gel highlights to the middle flower and then a large gemstone on the top (these are lovely - a new larger gemstone size we've just got in stock).  The swirl in the background is actually the flower swirl stamp from Chocolate Baroque Butterfly Flourish Swirls set.

I'm not a big one for adding flowers to my cards - but really liked the finished simplicity of this one - hope you do to!

happy crafting

jane

www.aldridgecrafts.co.uk

don't forget our Tattered Lace Die Prize Draw is still on - one entry for every individual Tattered Lace Die purchased online or instore before midnight 11th April for our prize draw to win a Tattered Lace die of our choice!

Shop for chocolate Baroque stamps
Shop for Cosmic shimmer Misters
Shop for Distress Inks

Tuesday, April 1, 2014

A touch of yellow, green and orange....


I'm part of the fabulous Chocolate Baroque Facebook Group - if you are a Chocolate Baroque fan - it's a great group to be part of as you get so much inspiration on how to use their stamps.  You can post your creations to share with the group and this week they have some colour challenges that got me creating!

here's my first for the yellow, green and orange challenge.  The background is Cosmic Shimmer Misters - Mango Blaze, Golden Mint and Pastel Chalk Yellow. 

The scene stamp is Chocolate Baroque Landscape Edges and the Happy Place wording is from Artistic Affirmations set.

I've stamped them both in Archival Black and then added some white gel pen highlights and a hand-drawn border with a black fineliner.

I've enjoyed working with this colour mix... more to come later this week!

Always fun to go with challenge colours - why not give it a try?

happy crafting

Jane

www.aldridgecrafts.co.uk

Shop for Cosmic Shimmer Misters
Shop for Chocolate Baroque Stamps

Thursday, March 20, 2014

Can you see the wood for the trees...?


A bit of an experimental project this one!  I had misted the background a long time ago - using a leaf mask and some bright colours in yellows, oranges and lime green tones with  a splash of blue.  I added my Sweet Poppy Walk in the Park stencil and used a gold embossing paste (from Dreamweaver) sprinkled with a little black and gold glitter (those who came to my demo morning saw me doing this bit!)  Once it had dried, I felt it needed a little bit of definition.  I added some distress ink using cut n dry - Dusky Concord - a purple shade.  The paste was a little tough on my sponge but a small price to pay!  I added the definiton to the trees to make them pop and then added a simple border to the left and bottom side using a fineliner and a ruler to draw three parallel lines. 

the bird is cut from black card using a Crafty Individuals die and the wording is hand-written onto white card.

It was all mounted onto an 8x8" card blank.

I was most pleased with the results on this one... a technique I will play with a bit more - coloured paste onto coloured backgrounds.

happy crafting

Jane

www.aldridgecrafts.co.uk
Shop for Sweet Poppy Stencils
Shop for Cosmic Shimmer misters
Shop for Crafty Individuals Dies

Tuesday, March 11, 2014

Little Black Dress


 This is another creation from Saturday's Demo.  I started with a sprayed background - Cosmic Shimmer Ink Misters - it looks like Red Firefly with a bit of gold (it's from my stash box - must remember to write the colours on the back!)

I've used the Chloe dress and applied translucent paste through it.  I've then covered it completely with black glitter.  I wanted to use the translucent rather than the black paste to show that the dark glitters cover it - you don't need a dark paste for a dark glitter.

I stamped the art deco style border using my new set of stamps from Chocolate Baroque (I've wanted these for ages!!) - Decorative Edges.  The scribbled border is just hand-drawn using a black fineliner pen... I've noticed my hand-drawn borders lately seem to be resembling barbed wire!!  obviously the country influence here in Norfolk! :-)

It's been mounted onto an 8x8" card blank with just a fine black border.

Had a very proud moment today... I didn't realise that when we were runner up for the best craft retailer for East Anglia that we would get a certificate to be able to let everyone know... well it arrived in the post today!  It will have pride of place!  Thank you so much to all the customers who voted for us!  happy times  :-)


happy crafting

Jane
www.aldridgecrafts.co.uk
Shop for Stencils (including Sweet Poppy)
Shop for Chocolate Baroque Stamps


Tuesday, March 4, 2014

Leftovers!


It's amazing what you can do with leftovers!  I've got into the habit now of flushing through my Ink Misters once I've used them to minimise the nozzles blocking.  Well after creating my steampunk panel the other day, I was using the blue and bronze misters so in order not to waste the ink, I unscrewed the nozzle (so it doesn't suck up any more ink) and sprayed it onto a blank piece of card to empty it and did the same with both colours - then took the nozzles and flushed them through with water.  Seemed a shame to waste all that ink - and by randomly covering my card - created this most amazing almost Patina like combination of colours - completely different from how they looked on my panel as there I had been very sparing with the dark bronze, this time I wasn't!

So what to do with my interesting coloured card.. aaaah I know, I can use my new Clarity stencil!  Clarity created the most amazing stencil and trade pack - I was reading on Barbara Grey's blog all about it - how it was all put together by themselves - and what a lovely idea to include a stencil for us all!  I've not got their stencils in stock yet (run out of budget at the trade show!!)... but they are on my list to get in stock soon - their range is fab!... anyways I digress....  I grabbed my stencil and run it through my Cuttlebug so it embossed the detail.  I left the stencil in place and carefully traced around all the outlines with my white gel pen - to give the design that extra bit of punch!  Just a few dashed lines at the bottom was all I felt it needed.

A really simple to construct design - but looks really effective - and it's now up on the gallery wall in the shop - do come and have a look at the colours and how they've mixed - its fab!

happy crafting

Jane

PS - don't forget - Sweet Poppy Stencil demo by me on Saturday at 10am in the shop!

www.aldridgecrafts.co.uk

Saturday, March 1, 2014

Autumnal Leaves (Yes I know it's almost spring....!)


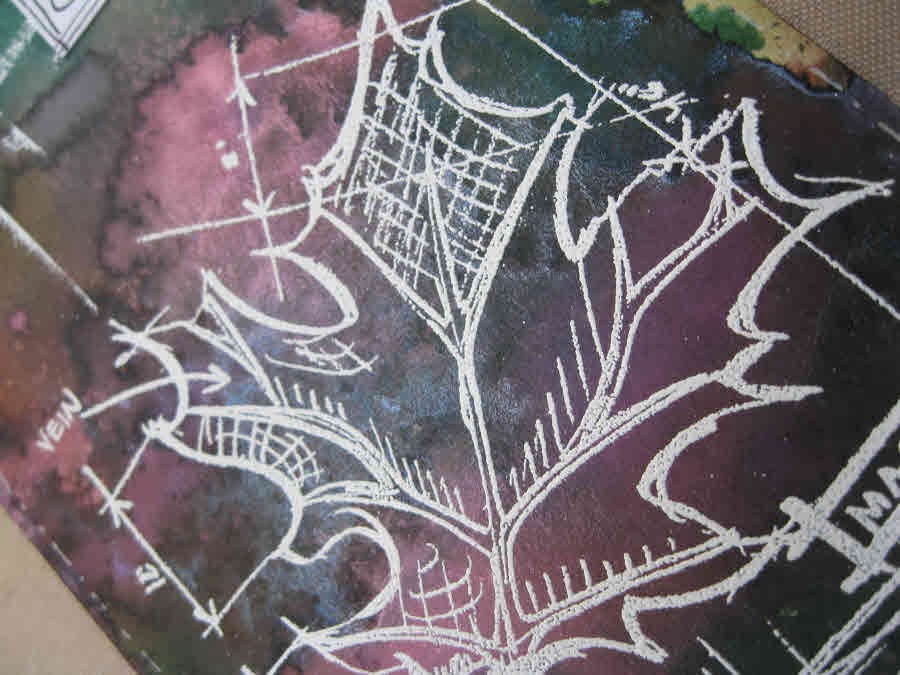
I've been playing with my new Tim Holtz stamps.  I picked these out as one of my Christmas presents, but haven't had a proper experiment with them yet.  I had this background in my stash that I had created using my ink misters - lots of dark shades - plums, black, bronze.  There was a few white areas at the edge of the card that were a bit too white, so I went over it with Peeled Paint Distress Ink. 

I stamped and embossed my leaf with white embossing powder and then added a dot and dash border with a white gel pen.  I hand-wrote the creativity wording and mounted at the top as a final detail.  The thread is shamballa thread that we've just had arrive in some fab new colours!

More from these stamp sets to come!

happy crafting!

Jane

www.aldridgecrafts.co.uk


I used the edge of my ruler to stamp the lines at the top and emboss with white powder.