Saturday, May 17, 2014
Indigoblu... more words! #145
I could only put in one entry for the Indigoblu words blog challenge - but I made a couple to choose between. This was the other piece I created. I started with a colourful cosmic shimmer ink spritzed background.
I started by stamping the Indigoblu Tree-mendous stamp around the borders in my latest acquisition - Archival Potting Soil. I then stamped my greeting from the BFF set in black. I drew a border around the greeting and added some dashes in black and white pen. I finally traced all the outlines of the leaves with a gold gel pen to add a little extra detail.
It was such a difficult choice in the end as to which one to enter into the blog challenge - I couldn't decide so my hubby got the final vote and preferred the colours of yesterday's piece.
So which is your favourite out of the two? Today's project or yesterday's one?
happy crafting
Jane
www.aldridgecrafts.co.uk
Friday, May 16, 2014
Indigoblu Words Challenge #144
I spotted that Indigoblu Challenge blog had a challenge theme of words this month - and thought I would have a go at creating something to enter the challenge.
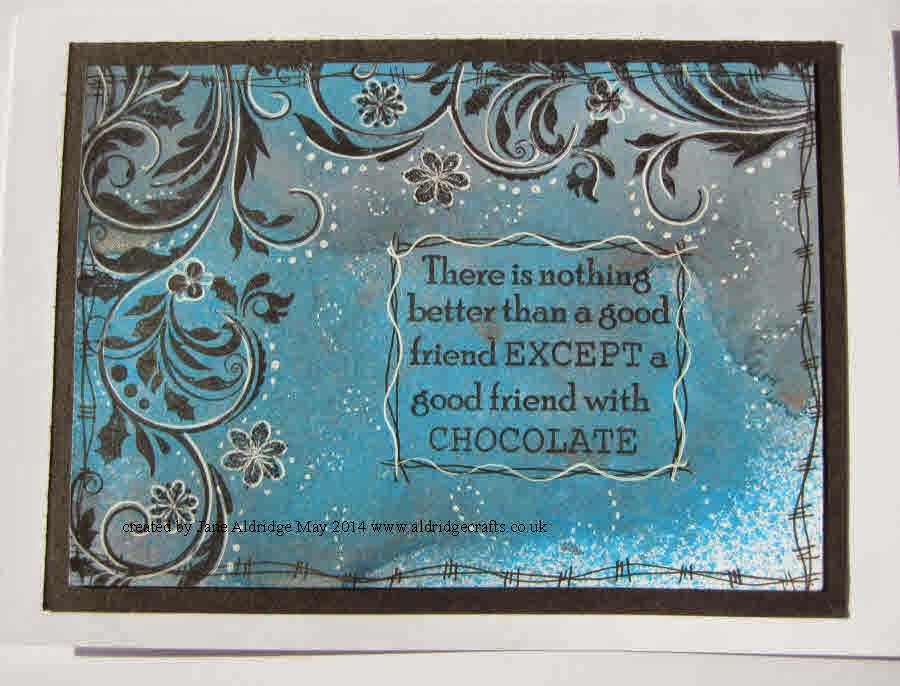
I started by spritzing my background with a mix of blue shade Cosmic Shimmer Mica Sprays. Once dry I stamped my words (Indigoblu BFF set).
I then started to add my border detail - I've used a Christmas stamp - (Indigoblu Baubles Flourish). I love this stamp because it's perfect for Christmas - but the rest of the year, just stamp the flourish part and turn the snowflakes into flowers!
I then added plenty of white and black pen highlights - including some little white dot swirls in the background. It's been mounted onto a simple black mount onto a 5x7" card.
I am entering this for the Indigoblu Challenge Blog Words are all you need Challenge
happy crafting
Jane
www.aldridgecrafts.co.uk
PS - don't forget it's craft club in Attleborough tonight - join us for a free Scrapbooking for beginners make & take!
Thursday, May 15, 2014
Kingfisher #143
I have had a lovely evening running a workshop for a local WI group creating pretty bag charms. It is always so nice to introduce new people to beading, they were all really pleased with their creations and we all had a lot of fun!
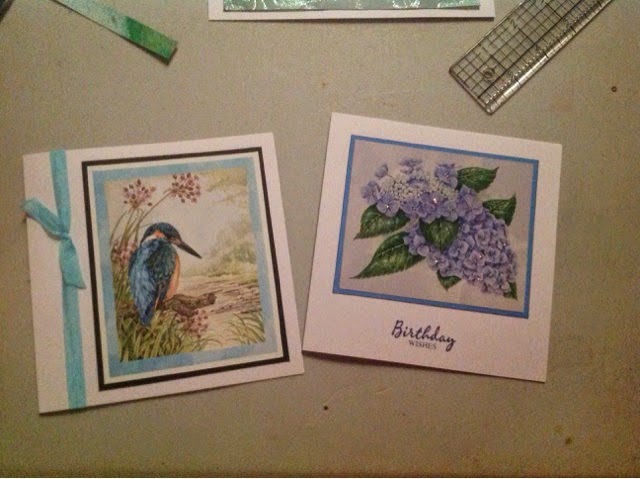
Today's projects are very quick and easy ones. I have been exploring my CD roms as it has been such a long time since i have made any cards with them. I wanted to rustle up a few quick and easy cards for the shop, and these always make such lovely cards without needing a lot of embellishments. Do excuse the poor photo today, i have left my camera at the shop so had to rely on my ipad taking photos under poor light. . Happy crafting
Jane
Wednesday, May 14, 2014
Blue and White Cat #142
More scrapbooking with kitty cat Finlay again today getting ready for our Scrapbooking session at craft club this Friday. My aim today was to create a really simple layout that was really easy for a beginner scrapbooker to achieve. It was also to show that scrapbooking doesn't have to be complicated - a simple photo, a simple layout is all you need.
Finn has such gorgeous blue eyes, going with a blue and white theme picked out the colour in the photo perfectly. I wanted a background paper that had something going on - but not too much that it would distract from the main focal point. The flower paper again - enough pattern without being overpowering. I mounted both the photo and the flower paper in the same card which is a brown/green/gold shimmer cardstock.
I next cut out some dies out of white cardstock - all Memory Box, I used Blooming Vine, Bella Bouquet, Chesapeake Circle. I cut a couple of each die so I could play around with layout. Once happy with how they sat I delicately lifted the card stock to dab a little glue so they would stick in the place I had positioned them. Once dry, I then turned over and added more glue and stuck down my central panel. A few little blue gemstones in the centre of the flowers added an extra detail.
I also added this hand-drawn border - ever so easy - just do a wibbly line with a little loop in every now and then.
an ever so subtle date written at the bottom of the photo panel was the final touch
It was very tempting to add more to this page, but I wanted to keep it nice and simple - hope you like it!
happy crafting
Jane
www.aldridgecrafts.co.uk
Finn has such gorgeous blue eyes, going with a blue and white theme picked out the colour in the photo perfectly. I wanted a background paper that had something going on - but not too much that it would distract from the main focal point. The flower paper again - enough pattern without being overpowering. I mounted both the photo and the flower paper in the same card which is a brown/green/gold shimmer cardstock.
I next cut out some dies out of white cardstock - all Memory Box, I used Blooming Vine, Bella Bouquet, Chesapeake Circle. I cut a couple of each die so I could play around with layout. Once happy with how they sat I delicately lifted the card stock to dab a little glue so they would stick in the place I had positioned them. Once dry, I then turned over and added more glue and stuck down my central panel. A few little blue gemstones in the centre of the flowers added an extra detail.
I also added this hand-drawn border - ever so easy - just do a wibbly line with a little loop in every now and then.
an ever so subtle date written at the bottom of the photo panel was the final touch
It was very tempting to add more to this page, but I wanted to keep it nice and simple - hope you like it!
happy crafting
Jane
www.aldridgecrafts.co.uk
Tuesday, May 13, 2014
Lazy Cat Nap #141
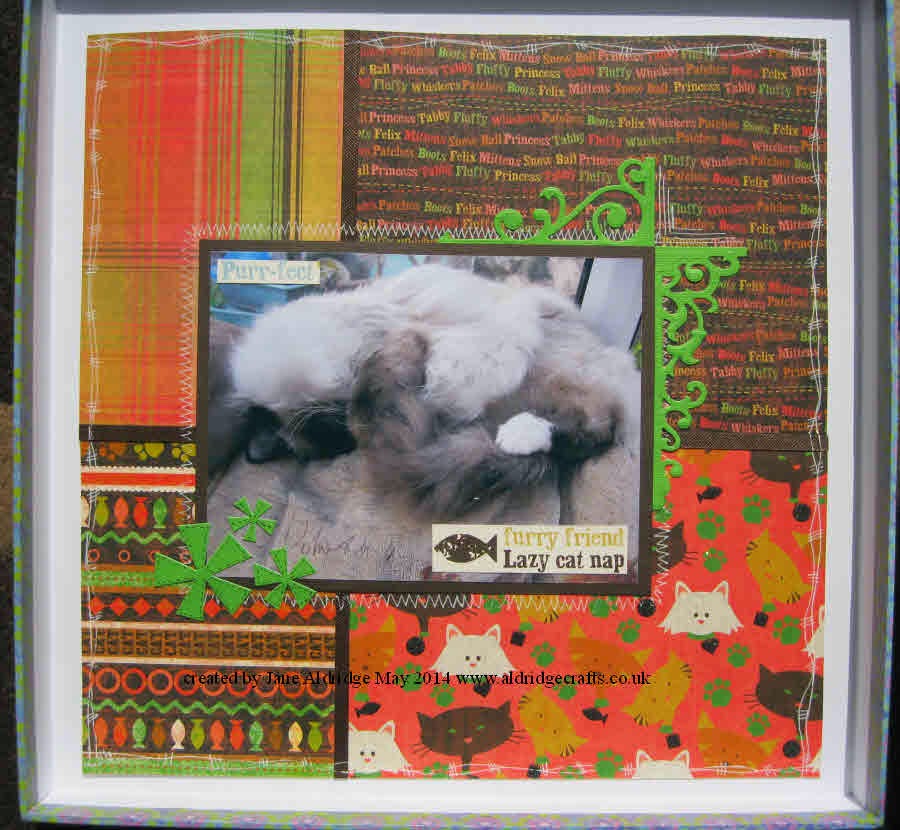
We are having a scrapbooking night at our craft club on Friday so the perfect excuse to create a few pages! and what do I scrapbook...? Of course it has to be my gorgeous one year old Birman cat Finlay. I just loved this pic of him sound asleep all curled up so this was my picture to start with.
I wanted this to be a bold bright page so the pale picture really would stand out. I used the DCWV Pets 8x8" stack. I started by taking out of the pad each of the cat pages - if you are anything like me - when you get one of these lovely card and paper stacks, they are a so lovely you don't want to use the papers!... so I always take them out of the book so no excuse then!
I wanted to use a variety of page designs and so I decided to split my page into four, but not so it was exactly central - ofsetting my squares gives a little more interest.
I mounted my picture on brown card an then cut a couple of thin strips to use as my divides between the pages.
I created a zigzag pattern around my picture with a white gel pen and cut some decorative elements with some green card - Elegant Posts from Spellbinders and the little flowers are cuttlebug dies. I added my now famous 'barbed wire' border in white gel pen. The words on the photo were cut from another page within the book.
Another scrapbook page to come tomorrow!
happy crafting
Jane
www.aldridgecrafts.co.uk
I wanted this to be a bold bright page so the pale picture really would stand out. I used the DCWV Pets 8x8" stack. I started by taking out of the pad each of the cat pages - if you are anything like me - when you get one of these lovely card and paper stacks, they are a so lovely you don't want to use the papers!... so I always take them out of the book so no excuse then!
I wanted to use a variety of page designs and so I decided to split my page into four, but not so it was exactly central - ofsetting my squares gives a little more interest.
I mounted my picture on brown card an then cut a couple of thin strips to use as my divides between the pages.
I created a zigzag pattern around my picture with a white gel pen and cut some decorative elements with some green card - Elegant Posts from Spellbinders and the little flowers are cuttlebug dies. I added my now famous 'barbed wire' border in white gel pen. The words on the photo were cut from another page within the book.
Another scrapbook page to come tomorrow!
happy crafting
Jane
www.aldridgecrafts.co.uk
Monday, May 12, 2014
Hot Pinks and Orange #140
I seem to be in a bit of a pink and orange phase at the moment - whenever I dive into my box of Distress Inks, I seem to gravitate towards Spiced Marmalade and Picked Raspberry.
I created this piece using the Chocolate Baroque Wild Meadow stamp set - a firm favourite of mine. The greeting is from the Chocolate Baroque Artistic Affirmations set. I've used a clock mask in teh background and stamped in dark shades of archival and Versafine inks to give that silhouette effect. A final bit of white and black highlights adds the finishing touches!
happy crafting
Jane
www.aldridgecrafts.co.uk
Sunday, May 11, 2014
Stamping Workshop #139
I've had such a great day today at our all day stamping workshop. This lovely deer card was my creation for today (I was too busy teaching to finish my other project!). This deer stamp is a Stacey Stamp. I've stamped in archival black and coloured using Cosmic Shimmer Drawing Inks. The background has been created using the Tim Holtz Shattered Mask and Gathered Twigs and Spiced Marmalade Distress inks. It has all been mounted onto an 8x8 card blank.
These are the fabulous creations of Laura and Lisa who joined me at today's workshop..
Aren't they fab!
![]() |
| Lisa's Steampunk card (Creative Expressions Stamp) |
![]() |
| Lisa's Daisy Card (Stampendous Jumbo Daisy Stamp) |
![]() |
| Laura's Lighthouse card (Crafty Individuals stamp) |
![]() |
| Laura's Peacock card (Chocolate Baroque Stamp) coloured with Cosmic Shimmer Watercolour Paints |
hope you got to have a crafty day too
Jane
www.aldridgecrafts.co.uk
Subscribe to:
Posts (Atom)